Wax, Dye, and Learning Curves
I normally stop by the Stone Branch Center for the Arts after church on Sundays. Most businesses around my little rural town are closed, but Stone Branch stays open—welcoming in the community after service. It’s a relaxed, casual atmosphere. A place to linger a little longer before the day moves on.
This time, when I walked in, I noticed a new face at the table sitting with the director, both of them decorating eggs.
The air was warm from small candles, and I could smell beeswax.
They told me they were making Pysanky—traditional Ukrainian eggs.
Interactive 3D Scan
Use your pointer to drag and rotate the egg.
Use the mouse wheel (or two fingers) to zoom in/out.
Starting Without a Plan
I was handed a couple of books filled with intricate designs, along with a tray: a candle, wooden-handled tools with small brass tips, and beeswax.
It was immediately intimidating.
The examples were incredibly detailed—precise, symmetrical, intentional.
I wasn’t sure where to start.
So I didn’t.
I just started.
A Familiar Feeling
As I sat there working with wax and dye, it brought back something I hadn’t thought about in years.
My mom used to sell art kits in the 80s through a company called Creative Expressions. It was a bit like Tupperware parties—but for arts and crafts. And yes, we had Tupperware parties at our house too.
She would let me pick out a kit now and then, and I’d spend hours working through them—latch hook rugs, cross-stitch, needlepoint, plastic canvas with yarn, and whatever else caught my interest.
Some people might find it unusual that I spent time on things stereotypically associated with the female gender, but growing up, I never really saw a difference. It was just something to do. Something to focus on.
This was before the internet—before endless distractions. If you were inside, out of the summer heat, you found ways to stay occupied. And for me, that often meant making something with my hands.
But this wasn’t the first time I had worked on eggs.
The last time I painted one, it was part of a ceramic set—characterized eggs with faces—at a small shop that had opened in the same building as the video store near my house, just within walking distance. I would go there and lose track of everything else, completely absorbed in the process.
When they were finished, I gave them to my mom. There were four or six in the set—I can’t remember exactly—but they were meant to represent either my siblings and me, or our whole family, including my parents.
Sitting at that table decorating an egg again, years later, I realized this wasn’t entirely new.
It just felt familiar.
The First Lines
I learned quickly that this wasn’t like painting. The wax flows based on heat, and mine flowed a little too well at first—thick, fast, and not particularly controlled.

I began with a spiral at the top, then added smaller spirals around it, using the edge of the nozzle more like a drawing tool. These would remain white in the end, preserved under layers of dye.
A rubber band helped divide the egg into two halves, and I used that as a guide to create a band filled with dots.
On the other side, I tried a checkerboard pattern, added another band below it, and left part of the egg blank—uncertain what would come next.
It felt less like following a plan and more like discovering one.
Dye That Didn’t Cooperate

There were seven dyes to choose from—yellow, orange, red, green, blue, purple, and black. Not the usual grocery store kit. These jars came with warnings: don’t eat the eggs, boil the dye, handle carefully.
I started with yellow.
My egg was hollow, with small holes at each end, which made submerging it surprisingly difficult. It wouldn’t sink. I had to hold it down with a spoon, and even then, the dye didn’t seem to take well.

After a few minutes, I settled for “good enough.”
Nearby, eggs rested on toothpicks stuck into foil-wrapped foam, drying in neat rows. Drops of dye had accumulated over time, forming a perfect spectrum—ROYGBIV—layered across the foil.
That detail stuck with me.
Improvising the Design
Back at the table, I kept going.
Wavy lines between spirals. Dots filling spaces. More structure in the checkerboard.
Eventually, shapes started suggesting something familiar.
Hair.
So I leaned into it.
A face began to form—nose, mustache, bangs, freckles.
It wasn’t planned. It just… happened.
The Experiment Phase
Green dye came next.
Or at least, it was supposed to.
It barely showed.
Blue? Same story.
Red? Even worse—grainy, uneven, speckled.
I started wondering why.
Maybe the shell had already absorbed as much as it could. Maybe the eggs had been washed before sale, affecting how the dye bonded. Maybe being hollow made a difference compared to the hard-boiled eggs others were using.
It turned into less of an art session and more of an experiment.
At one point, I found myself explaining how to make a “golden egg”—scrambling it inside the shell using a t-shirt or stocking and centrifugal force. It wasn’t directly related, but it fit the moment.
The director mentioned that I was a clown, and I brought up a fun fact: clowns in the UK copyright their faces with an egg registry, and there is a museum you can visit to see them.
We were all learning something.
Layer by Layer
Each time the egg dried, I added more wax—protecting areas I wanted to preserve before dipping into the next color.
The swirl side gained thicker bands.
The checkerboard became more defined.
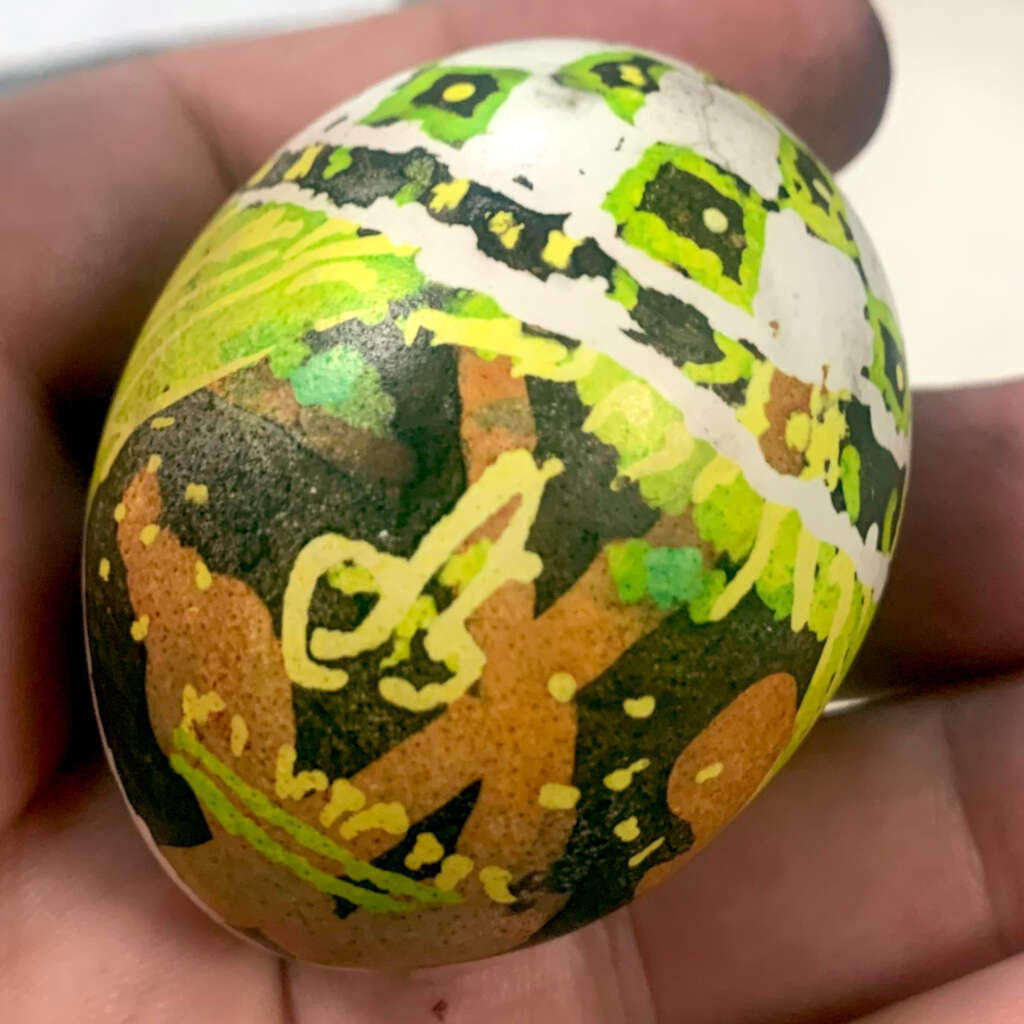
The face evolved—solid hair shapes, green lips (which I later realized should have been red), and outlines where eyes would be.
At some point, I stopped worrying about doing it “right.”
I just kept going.
The Reveal
After the final dip in black, it was time.
I held the egg over the candle and slowly melted the wax away, wiping it off with paper towels.
This was the moment I expected something magical—like ceramics coming out of a kiln, transformed.
The result?
Subtle.
The colors were there—but faint.
The blue eyes didn’t show up at all.

The face looked like it was wearing a checkerboard helmet, with something resembling war paint—and, unintentionally, a rather unfortunate shape for a nose.
The swirly pattern on the other side had moments of beauty, though parts of it blurred together.
Not perfect.
But not nothing, either.
What I Took From It
I appreciated the time.
The setup. The experimentation. The learning.
We all agreed—it was a first pass. A workshop to understand the process more than master it.

She sent me home with the egg in a cut carton for protection. We talked about how she drilled or nailed the holes, and I shared a small tool I use at home to pierce eggs before boiling.
Next time, I might plan a design.
Or maybe I won’t.
She showed me simpler geometric patterns—less intimidating than the ones in the books. That might be a better place to start.
Or maybe the point isn’t to start simple.
Maybe it’s just to start.
A few days later, I suggested trying larger eggs—ostrich, if we could find them, or even duck and goose eggs as a more practical option. A bigger surface might make the process a little easier to navigate.
But then again, maybe ease was never the point either.
Looking Ahead
Next Sunday: felted eggs.
I have a feeling I’ll be back.
One response to “Pysanky Ukrainian egg”
[…] hour to spare. I wandered into the Stone Branch Center for the Arts and joined a workshop on making Pysanky Ukrainian eggs—delicate, intricate, and completely […]