Not much time is available for today. I have a few household chores to do as well as a meeting tonight. The current state of the project is broken. I’ve got vertices missing in the rendered model. I’d like to get that fixed. Here are my goals for today.
- ❌ Verify reading/writing correct pixels
- ✅ Build entire mesh
- ✅ Edit selected vertex through UI
The list is small. There are other things I’d like to add if I have time. Mainly a shape creator to create some simple 3D shapes instead of loading a model. The challenge is that I’m constrained to the net of 32×32 vertices. In general, a cube only needs 6 vertices. With NURBS, you need a few extra vertices at the corners to try to preserve hard edges. This may add in the use of different stitching types to accomplish some of these so that a single vertex doesn’t represent a pole. I’d just like to see a sphere or cube load up at the click of a button.
Currently my model loads up broke. I’ve been able to muck about slowly. Making microscopic changes and checking my code in, one change at a time as things improve. A simple renaming of functions or variables to clarify intent. In one case I had variables named row/column when in fact they were x/y coordinates on an image.
The models missing vertices are fixed now. I still can’t edit vertex positions.
The two main areas are where I check to see if a pixel at an x/y coordinate is used as a vertex, and another area is the function to get the index of an x/y coordinate. Actually – that’s wrong. The spherical index maps rows and columns to an index. Naming is off as things have changed over time.
I may have found something. When drawing a new background, I copy pixels from one canvas to another. I changed it to call a function to draw the pixel and everything seems to break.
setPixelColorOnImageOfData(x, y, r, g, b);
// ctx.putImageData(pixel, x, y);
The image is gray and the model is not built.
Well, here is something. It appears that if you set the canvas height/width to another value, including its own value, the image disappears. Removing that code seems to have fixed a lot of things.
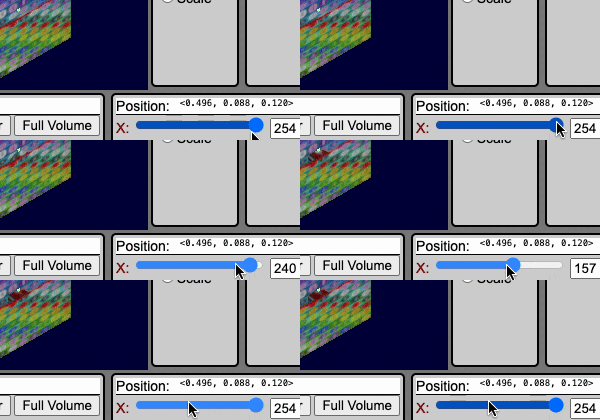
Now I’m onto editing positions. I get a rubber band effect when using the input range element.

I’m noticing a few things here. The position vertex in the title above the slider is not updated. The other thing is that the model is updated, but the vertex object does not update. I think I need to see what’s being updated when a position changes. I’m missing something somewhere.
And like that, my time has been cut short today. Did I achieve my goals? No. Did I make progress? Yes. It’s hard to feel like you’ve accomplished anything when goals are not met. Oh wait – I realized I did accomplish a goal. My models are rendering correctly now.
Ah Few Hours Later…
What do you know? I’m back. I had three engagements tonight and cut the last one short. I arrived back just as it was getting dark. Let’s see if we can figure out the rubber band slider where vertex values are not being updated.
Holy smokes. I got it. After the position changed with the input control, I had to follow the logic. It seemed like there was a lot going on. I crated a new function to just update an axis, and start updating one thing at a time.
- Update the range and numeric input fields for a specific input
- Update the vector displayed in the Position title bar with all three vectors
- Update the array of pixels (model data) in memory for the selected index
- Update the array of verticies used to build mesh objects
- Update the pixel that represents the selected vertex on the model datas image
- Update the selected vertex objects position in the scene to the new location
- Rebuild the model mesh
- Rebuild the wireframe mesh
- Rebuild the NURBS surface mesh
- Make a call to display a frame around the selected pixel on the model datas image
As I confirm everything is working, I see that the pixel representing the selected vertex is not changing. However everything else works – Model, Wireframe, NURBS, and 2D image. Wait a minute…

I’m playing with NURBS to see my vertex floating in space. I turned on all vertices as well and notice that one of the vertices is moving as I reposition it. It’s the red square in the picture. However – that is not the selected vertex object! The bigger cube is supposed to represent the selected vertex so that it wraps around the smaller vertex objects. There is another object that I need to update!

It turns out there was an object that represented the selected vertices. Perhaps I should combine the vertices object with the selected vertices object and toggle visibility/size accordingly.
With that setup, I can strike another item off of my list of goals for today. This leads into the action buttons to center the object, and expand it to the full volume. As I click on either one, the cube squishes itself along the top of its bounding box, and the poles local position jumps down to <-0.5, -0.5, -0.5> or <0, 0, 0> for the input xyz values.

Centering a cube should not result in it being squished. The cube takes up the full volume, so nothing should have changed.
function getPositionToCenterModel() {
  const worldPosition = new THREE.Vector3();
  modelObject.getWorldPosition(worldPosition);
  const boundingBox = new THREE.Box3().setFromObject(modelObject);
  const boundingBoxSize = boundingBox.getSize(new THREE.Vector3());
  boundingBox.getSize(boundingBoxSize);
  const center = boundingBox.getCenter(new THREE.Vector3());
  return center.multiplyScalar(-MAX_MODEL_SIZE);
}
A little progress. I was looping through each vertex and applied the same logic to update the model data. After the loop, I rebuilt the mesh objects and set their rotation/position/scale to the default. I discovered that I had a loop going on as a result of when the transform controls is created for each new camera view and fires the changed event. I added a guard to do nothing if the transform controls were not enabled. I’m still getting a squishy box.
It looks like I got somewhere. My logic is good – but there was another function call afterwards to updateVerticyPositions that seemed to have been causing problems with positioning. In addition, I’ve started adding checks so that if nothing has changed, then nothing is updated.
Still looking. I’m also noticing that the selected index isn’t updated properly when centering. The same problem exists for the vertices. It may be something to do with the objects “new” position, or because their bounding box is a little bigger than the model. I suspect its due to the new position more than anything, and baking the pixels to the models data image and internal memory afterwards.
A bit more progress. I’ve got the full volume button working correctly now. Similar to how the center button works, I had to center the model after applying scaling, otherwise some of my objects started to get smushed on top.

function scaleModelToBoundingVolume() {
  // need to 'rebake' vertices to get the bounding box to scale in the correct directions
  saveVerticesPositionsToModelData();
  resetModelPositionRotationAndScale();
  const epsilon = vectorSnapSize() / 2;
  const maxLength = MAX_MODEL_SIZE - epsilon;

  let boundingBox = new THREE.Box3().setFromObject(modelObject);
  let size = boundingBox.getSize(new THREE.Vector3());

  let changed = false;
  "xyz".split('')
    .forEach(axis => {
      const length = size[axis];
      if(length >= maxLength) return;
      changed = true;
      const scale = MAX_MODEL_SIZE / length;
      modelScale[axis] = scale * modelScale[axis];
      applyToModels((object) => {
        object.scale.copy(modelScale);
      });
    });

  if(changed) {
    // center - scaled object may have partially escaped the bounding box
    const center = getPositionToCenterModel();
    modelPosition.copy(center);
    applyToModels((object) => {
      object.position.copy(center);
    });

    saveVerticesPositionsToModelData();
    resetModelPositionRotationAndScale();
  }
};
What’s pretty neat is if you have the rotation setup to spin, the object tends to go outside of the bounding box and gets smushed on the edges. Doing it repeatedly causes you to end up with an odd shaped ball. A square cube can easily be changed into a boulder.

I’ve got one model called “Smile” that I like to test with that’s pretty much a mess. It looks to have been malformed and doesn’t look like a proper mesh. However, it builds geometry that’s great for me to test with centering, and expanding to the full volume. The problem with it is that the faces appear to be the wrong way at times, giving me nothing to click on. I can see vertices – but I can’t click on them. I took that feature away in favor of clicking the models UV map. I think I need to bring that back, but to only use it if the model wasn’t clicked. It would help out with NURBS as well since I have a lot of floating vertices. Maybe I should be targeting both at the same time with the ray casting.


Ok – I wired up all vertexes so that I can click them if the model isn’t clicked. It wasn’t working for that extra vertex though. I loaded up a cube model, applied NURBS and confirmed that I could select the individual vertices. Odd. Just for fun I rotated the cube and expanded it to have its corners smushed in. I saw a line of vertices floating on the side and couldn’t click them.

I think I know why I can’t select the vertex. It’s a pole! or it might be the hidden seam. That’s rite. When I update all of the vertexes, the poles actually map to the center index for that row. They hadn’t been updated accordingly.
I really need to get some sleep.